 |
| The hammock. I highly recommend a porch hammock. It's a toy, it's a nap/sleep place (on hot days/nights), and a general relaxation tool. The whole family loves it. |
And we set a doozy for ourselves this year. I wanted to re-do the garden area for several reasons. The first is that six boxes doesn't actually provide a ton of growing space. I know, I know! I'm so greedy! But so much of the garden was wasted in paths between the boxes (filled in with rocks) and it was pretty far away from the house. The area between the boxes was constantly overgrown and just a nuisance. The second reason is that the weeds were taking over in a serious way. I spent so much of my time digging mint and bindweed out of the garden boxes that I knew I'd never be able to get rid of it unless we also took out the garden boxes themselves.
We came up with an ambitious plan. The garden would be one large raised bed, about a third of our backyard. When we measured it out it came to 30x18 ft, or 540 sq ft. That's...a lot of growing space.
However, I didn't stop with the veggie garden. Since we were already going to be doing a large garden project I decided that we should do other landscaping as well. Under and around the fruit trees we planted over the last two years I decided to add a flower and herb garden. In the front yard, we've had these massive juniper bushes that, frankly, we hate. They took up so much space, they're prickly so the kids and dog never really went near them (well, the dog liked to pee on one of them from a distance), and they created a ridiculous amount of debris during each wind storm. Ugh. I'm sure they provide some ecological benefits around here, habitat for something, but not only are they ubiquitous, we also have a few giant ones on the other side of the house. I don't feel in the least bad about removing some of them.
 |
| After the rocks and half the tilling. |
So! The work started before I quit work. I began by digging out the rocks from between the garden beds. And by digging, I really mean that the soil underneath was so pocked that I mostly just had to get down on my hands and knees to gather them up by hand since the shovel just ran into dirt every time I tried to use it. Or, the shovel tore the rotting ground cloth that was under the rocks as well. Hooray. I spent days, weeks, doing this whenever I had a spare moment. I'd dump them in a bucket and then carry the bucket over to a tarp on our patio (we had no idea what we wanted to do with them yet) to dump into a pile. I moved so many rocks, you guys. So many. At least I got a really good workout, eh?
 |
| My giant pile of rocks, as seen from the porch |
In April, after I was done with work, my in-laws came. What a help! They both spent time with the kids, allowing us to get uninterrupted time to work, which is perhaps the thing I miss the most from when we were kid-free. My father-in-law helped us figure out what we wanted to use as the walls of our new garden bed, and gave so much help and advice, in addition to actual physical work. He also built us--as a belated housewarming gift--a set of stairs coming down off the back porch. Having no access to the backyard from our porch was the #1 thing keeping us from utilizing and enjoying our yard more. It's not that far, but having to go out the front and all the way around the house really did feel onerous. Now we feel like we can pop out back any time, and we're (I'm) more comfortable having the kids play back there with minimal supervision because if something happens I won't need to run all the way around the house to get to them. (It's fenced in.)
We decided on concrete pavers for the border wall of the garden because, even though it's far from the cheapest material, we wanted to do this once and then be done. Wood rots over time, obviously, even cedar. Which is also crazy expensive, comparable to the pavers we used for the amount we would have needed. For the back side, against the fence, we went with wood framed corrugated steel. The wood will need replacing at some point, but that shouldn't be for a good long while since it also has the support of the fence between our yard and the neighbors.
 |
| I found several holes and connecting tunnels like this through the former raised beds. What was made them? A mystery! |
Why do a raised bed at all? For one thing, it's easier to build up the soil that way. For another, being in the city can sometimes mean that ground soil is terribly polluted. We have no idea what's gone on here before we moved in and I didn't feel like sending a sample of the soil away to be tested. Especially since, having something walled off makes it far easier to keep kids and pets out of the garden. Well, mildly easier. At least, I can tell them to get out and they know the area I'm telling them to get out of. That counts for something, right? (Our dog is great. We've had a couple of visiting dogs tear through the garden, however.)
HusbandX and my brother-in-law tilled up the ground which was going to become garden, then we built the barrier. The work went much faster than one would expect, though I wouldn't say it was easy. Two long afternoons of work. HusbandX carefully leveled out each of the bricks on the bottom row. I had the easy part, merely supplying him with the bricks and then building up the next two rows once the bottom was settled. (My in-laws also helped with this.)
I decided to go with sheet mulching to build up the garden, in part because it's a great way to build long-term fertility (as things break down), to hold and maintain moisture (because the wood and wood chips will soak up water to slowly be released), and because that would be by far the cheapest way to fill such a huge area. The first step in sheet mulching, however, is cardboard. I've known since last summer that this was an upcoming project so I've been hoarding as many large pieces of cardboard as I could. We unexpectedly had to replace the bathtub in the downstairs apartment after it cracked, so I kept the boxes from the replacement tub out in our shed. They were massive! I also got a nice windfall one night when taking the dog for a walk on trash night. The neighbors must have bought some furniture because they had quite a few really big cardboard boxes by their recycling bin. I helped them out a bit by taking that home with me. Last, when I still needed more cardboard, I went to the nearby big box hardware store and asked if I could snag some cardboard. I was told that they have their own compactor for such things but that I was welcome to any waste cardboard I could find in the store. I got lucky and found an entire flatbed with boxes that had been broken down but not yet taken out.
 |
| One giant pile of mulch. It was as big as our car. |
The next step was to get mulch, preferably free but for a small fee if necessary. I called a couple of local arborists and, as it turned out, they both dumped mulch on my driveway. So instead of too little mulch I suddenly had an overabundance of it. I was originally told that I would need to pay a small fee to one of the companies, but the guy who owns the company waved me away when I tried to pay him. He said he was going right by our house anyway, so it worked out perfectly for him. He usually only wanted a fee to compensate for going out of his way. That works for me!
Some of the mulch was quite acidic, from pine trees, so I used that on my blueberry beds first thing. Top dressing with mulch does all the things listed above just as well as it does under soil. And since blueberries need acidity to thrive, I was doing at least three jobs with one layer of mulch. I can already tell that it's paying off, because the bushes are looking great. So many berries on them!
 |
| New garden area with the mulch laid down, plus some of the soil saved from the old beds. |
In the main garden I had the cardboard laid down, I had some logs (mostly firewood from the previous owners that was rotting) laid down to help hold more moisture and to add longer-term fertility, I had brush and branches we'd cleared from around our property laid down, I had some kitchen scraps and partially finished compost (ours) laid down, and then it was time for the mulch. Wheelbarrow after wheelbarrow, I carted mulch from my driveway back to the garden and spread it out in a nice, thick layer.
 |
| The diminished mulch pile next to the giant compost pile. |
The compost, when it arrived, was hot. And I mean this quite literally. On a warm spring day it was steaming. When I spread it out in the garden I couldn't stand on it with bare feet. And even though I waited a day and a half after spreading it before planting, I still ended up burning many of the first seeds I planted and needing to re-seed. Whoops!
 |
| Starting to dump in the compost. |
Since the compost was so hot, this also means that it's still breaking down. The fertility of the garden will actually be much better next year, and should begin to lightly drop off after that without further inputs. I do mean lightly. As long as I move the crops around it should be good for about another decade, since the mulch and everything underneath will be breaking down and adding fertility as well. However, we also have our own compost pile(s) and we still have a ton of mulch that we couldn't use (yet), so we'll be able to add amendments every year. We shouldn't need to purchase more compost or do anything major to the garden for a good long while.
 |
| The morning after the compost was put in I was asked, "Mommy, why is there a giant handprint in the garden?" |
Since it's one big garden bed, I decided to plant everything in rows. I read from several different sources--and by different, I mean differing on The Right and Only Way to Garden--that rows are the most water-efficient way to plant crops. When people who are philosophically opposed to one another agree on something I tend to sit up and take notice. In this case, I was skeptical but willing to give it a try. The water (supposedly) collects between the rows and ends up soaking down to collect underneath the mounds. The roots of the plants grow down and are able to tap into that water source. Additionally, with the mulch down there soaking up, collecting, and slowly releasing water, the idea was to go many days between watering plants, even at the height of summer. The only time when the plants need a ton of water is right at the beginning, before their roots could tap the deeper water. Even then, you're not supposed to water too much, otherwise the root systems will stay shallow with no incentive to dig deep. At least, that's my understanding. Since this project took so long I didn't get things planted until mid or even late May. I was irrigating a lot in the beginning, but if I'd planted earlier in the spring when it's naturally rainy I theoretically wouldn't have needed to irrigate for a long, long time.
 |
| With the rows all raked into place, anxiously waiting for something, anything, to start growing. |
So, does it work? Yes it does! My plants are well enough established that, even with a very hot week reaching 90F, I watered only once and that was pretty light. Only the very smallest plants, with poorly established roots, were wilting. Everything else looked remarkably happy, and is growing quite nicely. Since this method focuses on getting healthy root systems going, the plants are much better able to withstand more adversity than plants which are constantly irrigated. They are overall healthier and more robust. The visual difference is astounding.
Every gardener I know has noted that plants react very differently to irrigation/tap water than they do to rain water. Rain water is far preferable. Water from the hose certainly keeps the plants alive, but it doesn't seem to do much more than that. Rain water, on the other hand, has superpowers. The day after even a light rain my plants will be noticeably bigger. I don't know why this is. Nutrients from the atmosphere brought down by the rain? Lack of chemicals we put in drinking water? The particular gentleness with which the rain hits the ground? Whatever the reason, I'd much rather get as much water as possible from rain rather than the tap.
Since watering the plants has been our largest ongoing expense with gardening, anything that cuts down on that is a huge benefit. Seattle can be very wet and rainy, but we also have long stretches in the summer where there is no rain. It's not uncommon to go two or more months without rain. Being water wise is pretty crucial here. To be even more so, I've considered mulching between some of the plants. I thought about doing it between the rows but my husband protested that "then it wouldn't be fun to walk around barefoot". He's got a point. But having some mulch (in this case, a bale of hay left by the previous homeowners) spread on top of the mounds would also help collect rain, in addition to providing shade so that moisture doesn't evaporate as quickly. I haven't done it yet simply because I've been waiting for my plants to get just a bit bigger and more established. If we were truly in a dire water situation, one in which I couldn't irrigate at all such as a severe drought, I would mulch over the top and between the rows in a heartbeat. Since this also helps to keep weeds down it's a great strategy to go with, especially for people who want to garden but don't have much time, or with mobility issues that make bending over difficult. For people in more desert-y climates this is absolutely the way to go, since managing water is even more important.
The only part of this scheme that doesn't please me is how much space is taken up with the furrows between the rows, but that's because I'm an idiot. Next spring before I plant I'm going to re-work the mounds into keyholes and other shapes that utilize space more efficiently so that I can maximize my planting area. I feel silly for not thinking of that until after everything was planted.
So what did I plant this year?
-Several different varieties each of lettuce and spinach
-Swiss and rainbow chard
-Beets (Early Wonder variety--they only take 55 days to maturity!)
-Celery
-Tomatoes (fewer than I wanted because my younger child KO'd my starts several times--and I have no idea which varieties survived because I found them in a jumble on the floor!)
-Tomatillos that a friend gave me
-Five different types of carrots
-Basil
-Glass gem corn
-Butternut squash, zucchini, 2 types of pumpkins
-Five different types of beans, both bush and pole
-Sunflowers (to draw in pollinators and for the seeds--they're planted with some of the peas instead of a trellis)
-Peas (garden, sugar snap, and snow)
-Onions (3 varieties, two of them from starts)
-Broccoli
-Cabbage
-A rosemary plant that I fully understand will take over that corner of the garden. I'm willing to let it, because the strong smell helps deter some insect pests.
In the flower-and-herb garden I planted:
-Alpine strawberries
-Nasturtiums
-A peony
-Oregano
-Sage
-Thyme
-Catmint
-A bunch of strawberries I transplanted from a too-shady area
-I gave my older child 5 packets of flower seeds (mostly wildflowers) and let her go to town
-An attempt at watermelons that does not seem to be working out
-Chamomile
-Lavender (2 varieties)
Almost all of those plants serve more than one purpose. Nasturtiums are edible but they also help deter pests from the fruit trees. Chamomile planted under the cherry tree provides tea but also helps the cherry tree by deterring certain fungi and diseases, plus making the fruit taste better. The strawberries will spread and help keep out grass. The peony will attract pollinators, in addition to being among my favorite flowers. And so on. Making the most of what growing space you can is crucial. It's not strictly about how many plants you can cram into a certain space, but also about the relationship between the plants. Having multi-functional plants as often as possible can really make a small space seem much larger.
I got lucky because, ridiculous gardener that I am, I didn't take into consideration the water needs of my plants until after I planted them. As it turns out, I accidentally did well. The peony, lavender, and catmint, with lower water needs, are in an area that gets less rainfall due to being not only between (and, when they get bigger, under) our apple trees, they're also under the neighbor's sprawling apple tree. They get plenty of sun, but not as much rain as other parts of the garden. They're planted in mounds, with plenty of mulch underneath, so even over the winter they shouldn't be inundated and drowned. It turns out that managing water well for drought also manages water well for when there's too much rain, so planting in mounds or rows with lots of mulch is just always the way to go.
As for the front yard, where we removed the shrubs we replaced them with some of the garden boxes we had taken out of the back. In two of them we planted raspberries, and another is being used for potatoes. We still have one more shrub to remove and replace with a box, into which we'll plant more potatoes. I'm not expecting us to be self-sufficient in potatoes or really anything else, but I'd much rather have them than those stupid juniper shrubs.
Getting rid of the junipers also opened up space for the roses which someone planted a long time ago, but which were being crowded out by the junipers. The roses are much happier and bloomed much more this year than last year. I discovered that peonies and roses apparently grow really well together, so I planted two peonies next to and under a couple of rose bushes. They're thriving in that spot, which in a few summers will be both lush and fragrant. And gorgeous.
Becoming a worm farmer
In my garden, I have deliberately set out to do things in a way that not only maximizes the use of space for the people who live here but also to try to build up the ecology of my area. In particular, insects. I know I'm doing well as a gardener and steward of this land when I look out in the evening to see swarms of insects buzzing around. I love seeing so many bees (at least four different types that I've counted) flying in and out. And because there's so much bug activity, on any sunny afternoon I can easily discern at least five different types of birds singing and chirping around our house. We, societally, tend to think of insects as omnipresent nuisances but they are actually in decline. Which means that birds, possums, bats, and any other creature or plant that depends on insects is in trouble. Which means that we, humans, are in trouble because we depend on insects too.
As I was digging out rocks and turning soil and doing any number of the tasks involved in this renovation, I found hundreds of worms. Many were small but one of them was about as long as my hand and, when scrunched up, a good 1/4 inch thick. I dubbed it Fatty McWormchunks. The Munchkin and I had a grand time watching Fatty squirm on my hand for a few minutes as we talked about worms. We discussed how important they are, and what they do to the soil. It was heartening to know that I had so many worms around, happily getting fat. I later found a few more approximately the same size as Fatty.
I moved many of these worms to a new home. Some were relocated to a different area of the garden, where they wouldn't be disturbed again, but others I collected in a worm bin. Making a worm bin has been a long-held ambition of mine, but we never really had a good place to keep one before. You can buy some that fit under the sink, but I was worried about how small they are. So I'd have enough to add a couple tablespoons of scraps every few weeks, big deal.
Well, I finally made a worm bin. I bought two dark totes with nicely fitting (locking) lids. I drilled some drainage holes in the bottom of each, and breathing holes around the tops. Then I laid down shredded paper (the newspapery fliers we receive in the mail worked nicely) and some cut up toilet paper tubes (to ensure there's not too much compaction), dampened it all, and began collecting my worms. We added some food scraps--cut up into small pieces to help the worms eat it faster--and then I laid a damp piece of cardboard over the top. Ta-da! A little worm farm. Vermicompost is an incredibly potent form of compost, with all kinds of benefits. Being able to add the worm castings (poop) to the garden as an amendment will help to keep the fertility of my soil up. When the first one gets full, or when I want to use the vermicompost, I can place the second one on top with fresh bedding (the newspaper and toilet paper), a new piece of cardboard, and food. In about a month most of the worms will migrate and then I can use the compost.
You don't need a large garden, or any garden, to use vermicompost. A few houseplants will do nicely as well, and if you happen to make too much for yourself you could always give it away to a grateful friend or neighbor. Or even sell it for a few bucks to someone who gardens.
It's hard to tell how well the worm bin is working, since I've added even more shredded newspaper. (My raspberry canes came wrapped in it.) But it doesn't smell and there aren't clouds of fruit flies, or any other insects, hovering over it so it seems to be healthy. I have no idea how long it will take before I'm able to harvest any of the compost but for now I'm just excited to have this project going at all.
So we're done now, right?
Haha, this is far from the last landscaping/yard project we'll be doing. I have ideas for adding more fruit bushes and maybe even some grape vines. We've been talking about re-doing the roof of our shed--putting a metal roof on so that we can collect rainwater to use in the garden. Additionally, the front of the shed is bright and sunny, maybe a good site for solar panels?
We want to add our own honeybees at some point, when my brother-in-law's bee box(es) can be brought down from Alaska. We'll build a shelf on the side of the shed that gets morning light to keep the bees off the ground and help them get and stay warm. (Crucial for bees.)
We'd like to do a small greenhouse somewhere as well. It would make starting plants easier in the spring, in addition to adding to our ability to grow things over the winter. Additionally, it would give us a safe place to keep our lemon tree. It was a bit of a PITA to keep in the house last winter.
Last, we've also talked about putting in some sort of jungle gym or climbing structure in the grassy part of the yard for the kids. We put in a pull-up bar under the porch, with gymastics rings hanging down at a good height for the Munchkin to play on. But something even more kid-friendly would be nice too, especially for Little Miss who's not quite ready for the rings yet.
I'm happy with what we've done so far, though. This is a massive change and one that will accrue many benefits in the future.
Every gardener I know has noted that plants react very differently to irrigation/tap water than they do to rain water. Rain water is far preferable. Water from the hose certainly keeps the plants alive, but it doesn't seem to do much more than that. Rain water, on the other hand, has superpowers. The day after even a light rain my plants will be noticeably bigger. I don't know why this is. Nutrients from the atmosphere brought down by the rain? Lack of chemicals we put in drinking water? The particular gentleness with which the rain hits the ground? Whatever the reason, I'd much rather get as much water as possible from rain rather than the tap.
Since watering the plants has been our largest ongoing expense with gardening, anything that cuts down on that is a huge benefit. Seattle can be very wet and rainy, but we also have long stretches in the summer where there is no rain. It's not uncommon to go two or more months without rain. Being water wise is pretty crucial here. To be even more so, I've considered mulching between some of the plants. I thought about doing it between the rows but my husband protested that "then it wouldn't be fun to walk around barefoot". He's got a point. But having some mulch (in this case, a bale of hay left by the previous homeowners) spread on top of the mounds would also help collect rain, in addition to providing shade so that moisture doesn't evaporate as quickly. I haven't done it yet simply because I've been waiting for my plants to get just a bit bigger and more established. If we were truly in a dire water situation, one in which I couldn't irrigate at all such as a severe drought, I would mulch over the top and between the rows in a heartbeat. Since this also helps to keep weeds down it's a great strategy to go with, especially for people who want to garden but don't have much time, or with mobility issues that make bending over difficult. For people in more desert-y climates this is absolutely the way to go, since managing water is even more important.
 |
| About a month ago, when things were finally starting. |
The only part of this scheme that doesn't please me is how much space is taken up with the furrows between the rows, but that's because I'm an idiot. Next spring before I plant I'm going to re-work the mounds into keyholes and other shapes that utilize space more efficiently so that I can maximize my planting area. I feel silly for not thinking of that until after everything was planted.
 |
| And now! Er, two weeks ago. Some of the areas that look thin have carrots and onions, which are not as visible in pictures. Others are waiting for the plants in them to get much, much bigger. Such as the tomatoes. |
So what did I plant this year?
-Several different varieties each of lettuce and spinach
-Swiss and rainbow chard
-Beets (Early Wonder variety--they only take 55 days to maturity!)
-Celery
-Tomatoes (fewer than I wanted because my younger child KO'd my starts several times--and I have no idea which varieties survived because I found them in a jumble on the floor!)
-Tomatillos that a friend gave me
-Five different types of carrots
-Basil
-Glass gem corn
-Butternut squash, zucchini, 2 types of pumpkins
-Five different types of beans, both bush and pole
-Sunflowers (to draw in pollinators and for the seeds--they're planted with some of the peas instead of a trellis)
-Peas (garden, sugar snap, and snow)
-Onions (3 varieties, two of them from starts)
-Broccoli
-Cabbage
-A rosemary plant that I fully understand will take over that corner of the garden. I'm willing to let it, because the strong smell helps deter some insect pests.
In the flower-and-herb garden I planted:
 |
| The flower and herb garden from the porch. On the left, you can see where all the flower seeds I gave my kiddo ended up. |
-Alpine strawberries
-Nasturtiums
-A peony
-Oregano
-Sage
-Thyme
-Catmint
-A bunch of strawberries I transplanted from a too-shady area
-I gave my older child 5 packets of flower seeds (mostly wildflowers) and let her go to town
-An attempt at watermelons that does not seem to be working out
-Chamomile
-Lavender (2 varieties)
Almost all of those plants serve more than one purpose. Nasturtiums are edible but they also help deter pests from the fruit trees. Chamomile planted under the cherry tree provides tea but also helps the cherry tree by deterring certain fungi and diseases, plus making the fruit taste better. The strawberries will spread and help keep out grass. The peony will attract pollinators, in addition to being among my favorite flowers. And so on. Making the most of what growing space you can is crucial. It's not strictly about how many plants you can cram into a certain space, but also about the relationship between the plants. Having multi-functional plants as often as possible can really make a small space seem much larger.
 |
| Nasturtiums! |
I got lucky because, ridiculous gardener that I am, I didn't take into consideration the water needs of my plants until after I planted them. As it turns out, I accidentally did well. The peony, lavender, and catmint, with lower water needs, are in an area that gets less rainfall due to being not only between (and, when they get bigger, under) our apple trees, they're also under the neighbor's sprawling apple tree. They get plenty of sun, but not as much rain as other parts of the garden. They're planted in mounds, with plenty of mulch underneath, so even over the winter they shouldn't be inundated and drowned. It turns out that managing water well for drought also manages water well for when there's too much rain, so planting in mounds or rows with lots of mulch is just always the way to go.
 |
| Chamomile |
As for the front yard, where we removed the shrubs we replaced them with some of the garden boxes we had taken out of the back. In two of them we planted raspberries, and another is being used for potatoes. We still have one more shrub to remove and replace with a box, into which we'll plant more potatoes. I'm not expecting us to be self-sufficient in potatoes or really anything else, but I'd much rather have them than those stupid juniper shrubs.
Getting rid of the junipers also opened up space for the roses which someone planted a long time ago, but which were being crowded out by the junipers. The roses are much happier and bloomed much more this year than last year. I discovered that peonies and roses apparently grow really well together, so I planted two peonies next to and under a couple of rose bushes. They're thriving in that spot, which in a few summers will be both lush and fragrant. And gorgeous.
 |
| Raspberries! |
Becoming a worm farmer
In my garden, I have deliberately set out to do things in a way that not only maximizes the use of space for the people who live here but also to try to build up the ecology of my area. In particular, insects. I know I'm doing well as a gardener and steward of this land when I look out in the evening to see swarms of insects buzzing around. I love seeing so many bees (at least four different types that I've counted) flying in and out. And because there's so much bug activity, on any sunny afternoon I can easily discern at least five different types of birds singing and chirping around our house. We, societally, tend to think of insects as omnipresent nuisances but they are actually in decline. Which means that birds, possums, bats, and any other creature or plant that depends on insects is in trouble. Which means that we, humans, are in trouble because we depend on insects too.
As I was digging out rocks and turning soil and doing any number of the tasks involved in this renovation, I found hundreds of worms. Many were small but one of them was about as long as my hand and, when scrunched up, a good 1/4 inch thick. I dubbed it Fatty McWormchunks. The Munchkin and I had a grand time watching Fatty squirm on my hand for a few minutes as we talked about worms. We discussed how important they are, and what they do to the soil. It was heartening to know that I had so many worms around, happily getting fat. I later found a few more approximately the same size as Fatty.
 |
| One bin, with a 55 lb. dog and kids' toys for scale. |
I moved many of these worms to a new home. Some were relocated to a different area of the garden, where they wouldn't be disturbed again, but others I collected in a worm bin. Making a worm bin has been a long-held ambition of mine, but we never really had a good place to keep one before. You can buy some that fit under the sink, but I was worried about how small they are. So I'd have enough to add a couple tablespoons of scraps every few weeks, big deal.
Well, I finally made a worm bin. I bought two dark totes with nicely fitting (locking) lids. I drilled some drainage holes in the bottom of each, and breathing holes around the tops. Then I laid down shredded paper (the newspapery fliers we receive in the mail worked nicely) and some cut up toilet paper tubes (to ensure there's not too much compaction), dampened it all, and began collecting my worms. We added some food scraps--cut up into small pieces to help the worms eat it faster--and then I laid a damp piece of cardboard over the top. Ta-da! A little worm farm. Vermicompost is an incredibly potent form of compost, with all kinds of benefits. Being able to add the worm castings (poop) to the garden as an amendment will help to keep the fertility of my soil up. When the first one gets full, or when I want to use the vermicompost, I can place the second one on top with fresh bedding (the newspaper and toilet paper), a new piece of cardboard, and food. In about a month most of the worms will migrate and then I can use the compost.
You don't need a large garden, or any garden, to use vermicompost. A few houseplants will do nicely as well, and if you happen to make too much for yourself you could always give it away to a grateful friend or neighbor. Or even sell it for a few bucks to someone who gardens.
It's hard to tell how well the worm bin is working, since I've added even more shredded newspaper. (My raspberry canes came wrapped in it.) But it doesn't smell and there aren't clouds of fruit flies, or any other insects, hovering over it so it seems to be healthy. I have no idea how long it will take before I'm able to harvest any of the compost but for now I'm just excited to have this project going at all.
So we're done now, right?
Haha, this is far from the last landscaping/yard project we'll be doing. I have ideas for adding more fruit bushes and maybe even some grape vines. We've been talking about re-doing the roof of our shed--putting a metal roof on so that we can collect rainwater to use in the garden. Additionally, the front of the shed is bright and sunny, maybe a good site for solar panels?
 |
| I'm sad that I didn't get pictures of all the varieties of fungi and mushrooms that grew in the compost--a good sign of healthy soil. They've been so beautiful! |
We'd like to do a small greenhouse somewhere as well. It would make starting plants easier in the spring, in addition to adding to our ability to grow things over the winter. Additionally, it would give us a safe place to keep our lemon tree. It was a bit of a PITA to keep in the house last winter.
Last, we've also talked about putting in some sort of jungle gym or climbing structure in the grassy part of the yard for the kids. We put in a pull-up bar under the porch, with gymastics rings hanging down at a good height for the Munchkin to play on. But something even more kid-friendly would be nice too, especially for Little Miss who's not quite ready for the rings yet.
 |
| Another gorgeous fungi. There have been at least six types that I've noticed. |
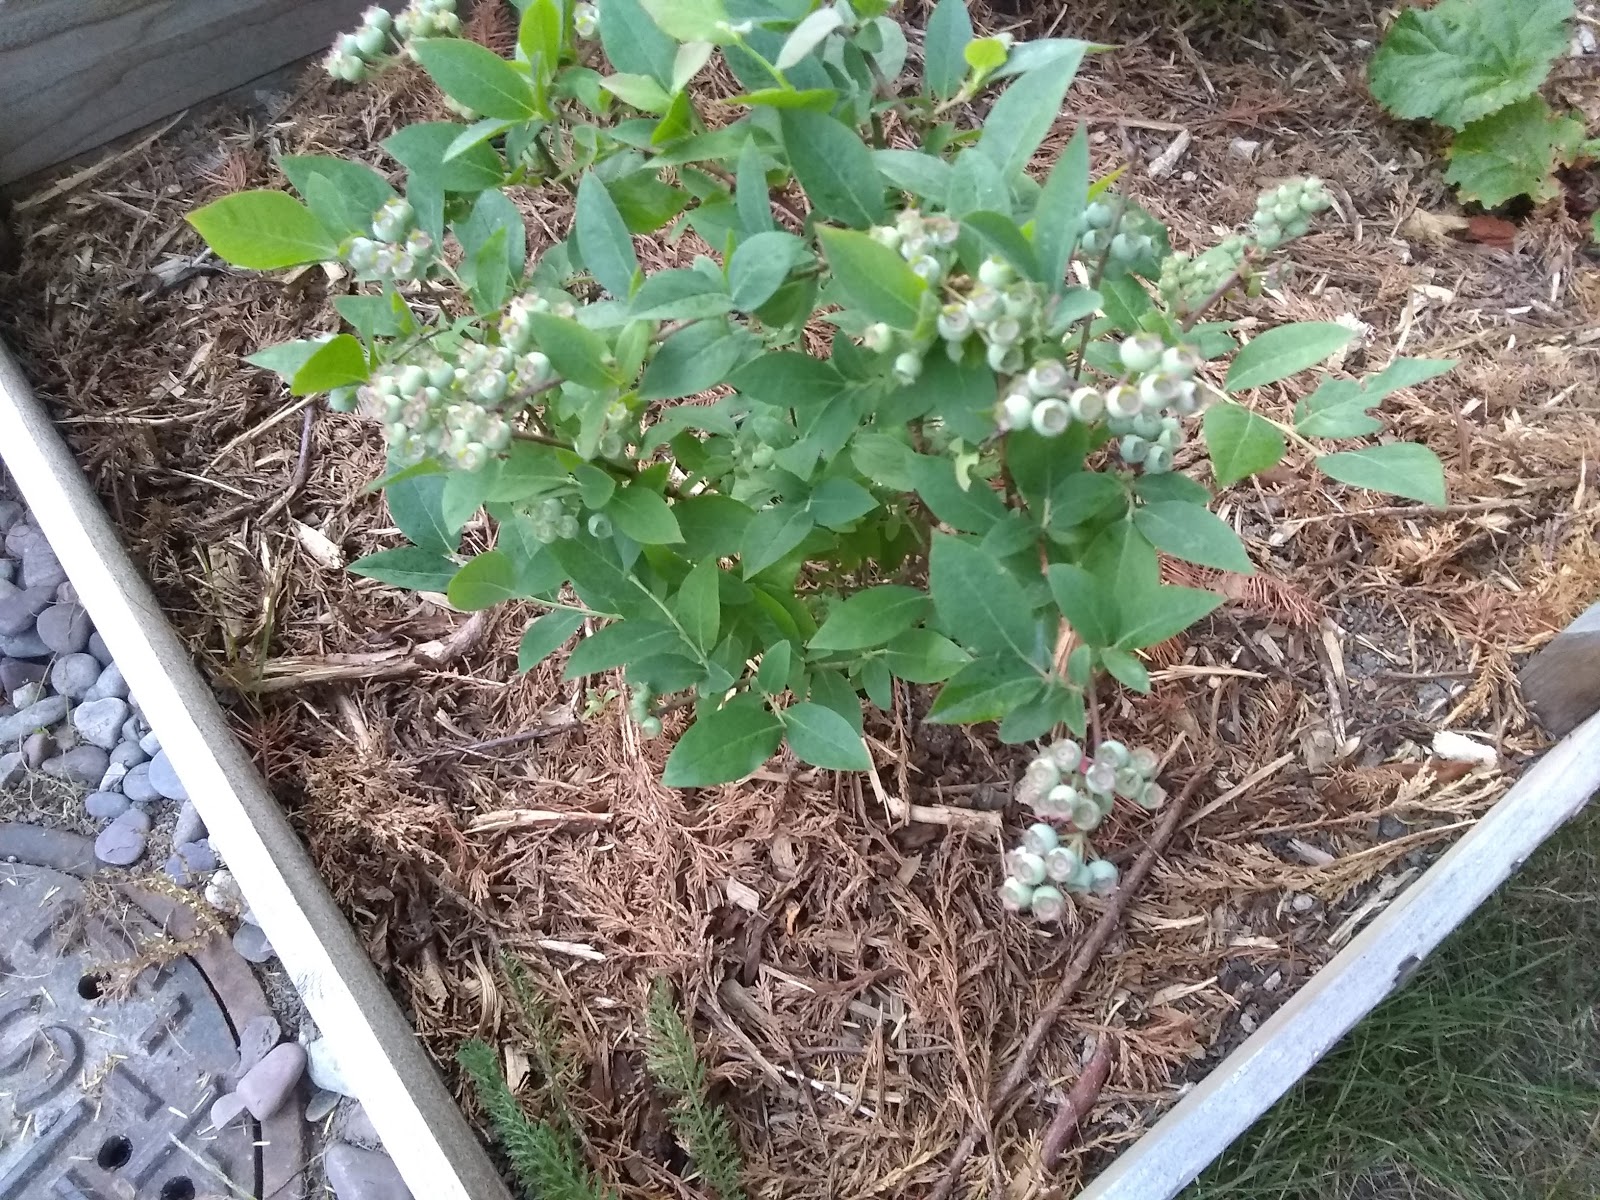 |
| Blueberries! We should get at least a pint of berries from this bush alone. |